Dear Customer!
We strongly recommend to read this documentation attentively to save your time during further setting up of our theme.
WordPress Installation
This theme requires a working version of WordPress to already be installed on your server. If you need to install WordPress then please visit: https://wordpress.org/download. If you need any help with the installation, please refer to the guide below:
MySQL version 5.6 or greater / MariaDB version 10.0 or greater
WP Memory limit of 128 MB or greater
max_execution_time 360 (This needs to be increased if your server is slow and cannot import data.)
PHP Post Max Size: 128 MB or greater
Upload File Size: 128 MB
PHP Time Limit: 360
WordPress version 4.7 or greater.
Theme Installation
Upload Avas Theme
The theme files need to be uploaded before you can activate the theme for use. There are two ways you can do this, FTP upload or WordPress upload.
If you are uploading via FTP upload, then you need to upload the unzipped folder “avas” to the /wp-content/themes folder of your WordPress installation.
If you are uploading via WordPress upload, please go to WP Dashboard > Appearance > Themes > Add New > Upload Theme > Choose File. Select the zipped file “avas.zip” and then hit "Install Now". After installed the theme successfully you need to click "Activate" button to activate the theme.
Child Theme Installation
We have provided a child theme package ready for you to use if you wish to make changes to files, while keeping them through updates. The child theme is included within the main download folder, and is named "avas-child.zip" all you need to do is extract and upload this into themes folder or add as new theme from admin panel, and then activate the child theme in Appearance > Themes from the WordPress menu.
style.css
We've include the child theme css file ready for you to add your own styles, if you'd prefer to do it here rather than in the custom css box within the theme options. If you are adding styles here, but aren't seeing them on the front end, try adding !important to the end of the declaration. This is sometimes needed to override the dynamic css styles that are generated from the theme options customisations.
functions.php
We've also included a child theme functions.php file, which you can use to add your own php functions, or override functions from the parent theme. If you'd like to do this, make sure you check out the developers documentation for the theme.
Warning: Please do not activate child theme while import demo.
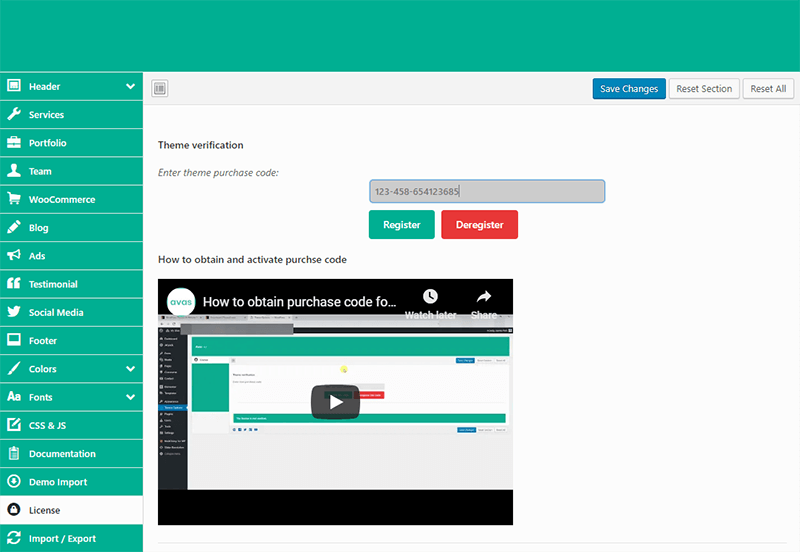
Theme Registration
After activate theme please go to Theme Options > License > enter yoru purchase code then click save button then click Register button.
How to Deregister Theme
If you wish to switch your domian or install the theme in another domain you need to deregister the purchase code from your existing domain first via Theme Options > License > Deregister.
If you delete the site or theme without deregister then please contact us via our support section here we will reset it for you.
Common Errors
If you get an error saying that the stylesheet is missing, that's mean you have uploaded the wrong zip file. Please check that you are uploading the avas.zip within the theme folder. You may have to unzip the avas-main.zip file that you have downloaded from ThemeForest.
After activate Avas Core plugin if you are getting error message something like this “Parse error: syntax error, unexpected ‘&&’ (T_BOOLEAN_AND), expecting ‘)’ in ..... it seems you have old PHP version in your web hosting server so please upgrade your server PHP version at least 5.6 or to the latest version.
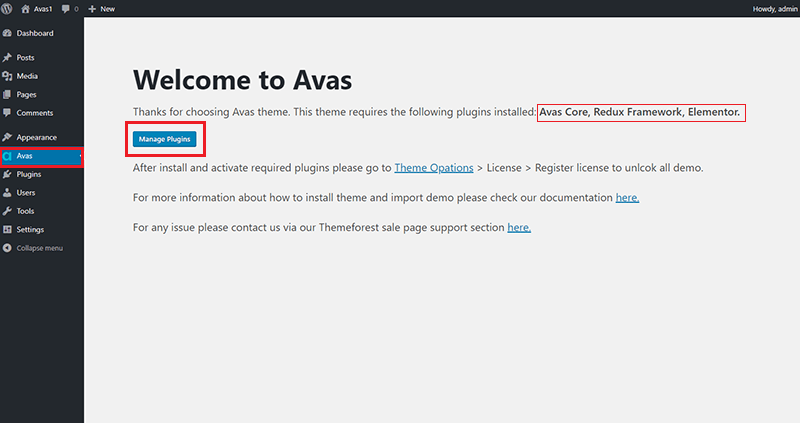
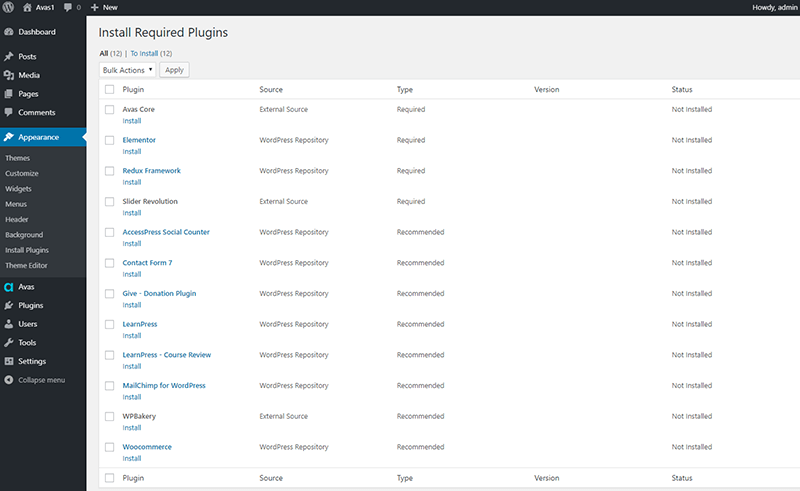
Plugins Installation
Now that you have activated Avas Theme, you will see a welceome screen. You need to click "Manage Plugins" button so you will redirect to the plugins list. You need to install Avas Core, Redux Framework, Elementor to work with the theme.
If you couldn't find plugin list please go to WP Dashboard > Avas > Manage Plugins.
If you get any error while try to install Avas Core plugin, please directly download it from here then upload it via your web hosting cPanel filemanager or FTP then extract it there.
Plugins Update
If you need to update Avas Core, WPBakery or Slider Revolution then please go to WP Dashboard > Plugins > then deactivate the plugin and delete the plugin too. After that please go to WP Dashboard > Appearance > Install Plugins > Please install the plguin from there so you will have the latest version of the plugin.
Demo Data Installation
Log into your site as an administrator.
Make sure you have activated Avas theme and required plugins before proceeding.
Please do not activate Child Theme and WPBakery (Visual Composer) plugin while import demo.
Please go to Theme Options then go to Demo Install then click "Import Demo" button(It could take from 2 mins to 15 mins depends on your web hosting server speed).
If import process get stuck, please refresh the page and click the "Import Demo" button again.
By chance demo do not work properly after successfully imported then please click the "Re-Import" button again.
After successfully import demo data please go to Appearance >> Menus then scroll down and check the "Main Menu" check box.
Please go to Settings >> Permalinks select the radio button "Post name" and scroll down then set "Shop base" then click Save changes button to save the settings.
We are done!
By chance if you unable to import demo data via admin panel. We have attached the demo data included this theme called "Demo-data".
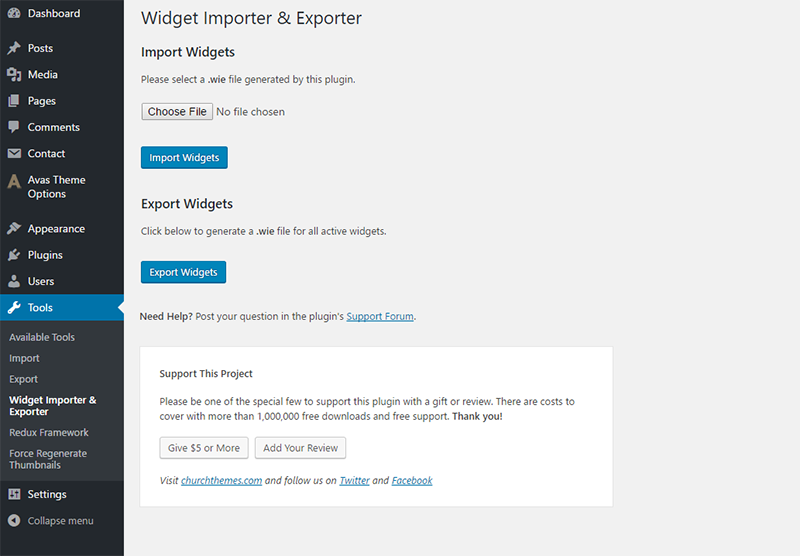
You need to install "WordPress Importer" and "Widget Importer & Exporter" plugin to import demo data.
Contents Import - To import posts, pages, portfolios, testimonials, contact form and menu items please go to Tools >> Import from WordPress admin panel, then there you can see many import options. Please see the below where you will find WordPress and underneath "Run Import" Please click on Run Import it will redirect you the page where you will see "Choose File" field. Please click on Choose File field and upload the "content.xml" file from Demo-data folder then click "Upload file and import".
Please assign a user from drop down list then check the "Download and import file attachments" box and click Submit.
Widgets Import - To import sidebar and footer widgets please go to Tools >> Widget Importer & Exporter from WordPress admin panel then click Choose File and select the widgets.wie file from Demo-data folder. Now click Import Widgets button.
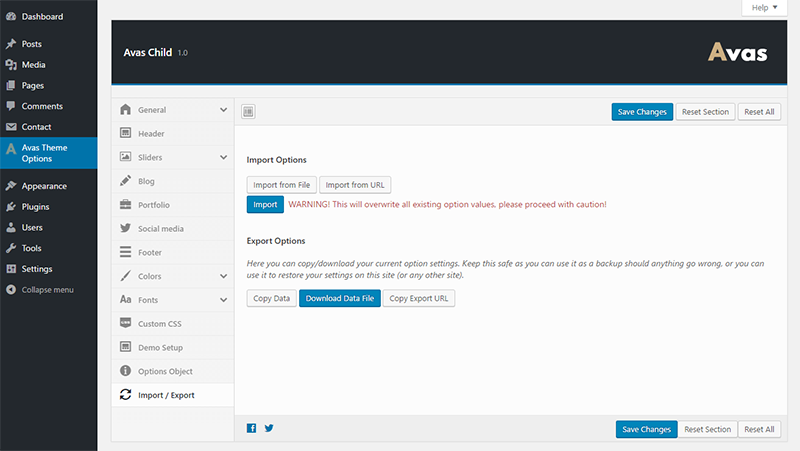
Theme Options Import - To import theme opttions please go to Avas Theme Options from wordpress admin panel then click "Import / Export" where you can see Import from file button, please click that button it will open a text box, now please go to theme folder and open Demo-data folder where you can find theme-options.txt file. Please open that file and copy all text then paste on the text box now click import button.
Slider Import - We have attached slider revolution demo file with this theme folder called "slider revolution" under demo-data folder.
We also attached Slider Revolution documentation. Please read the documentation for how to import slider file.
We are done! Pleaes note it won't be imported the same images as our demo due to copyright issue. If you still having problem to import demo data please contact with us through themeforest profile page.
For better result please increase your server settings as below:
PHP Memory Limit: 256 MB
max_execution_time 320 (This needs to be increased if your server is slow and cannot import data.)
PHP Post Max Size: 128 MB
PHP Time Limit: 360
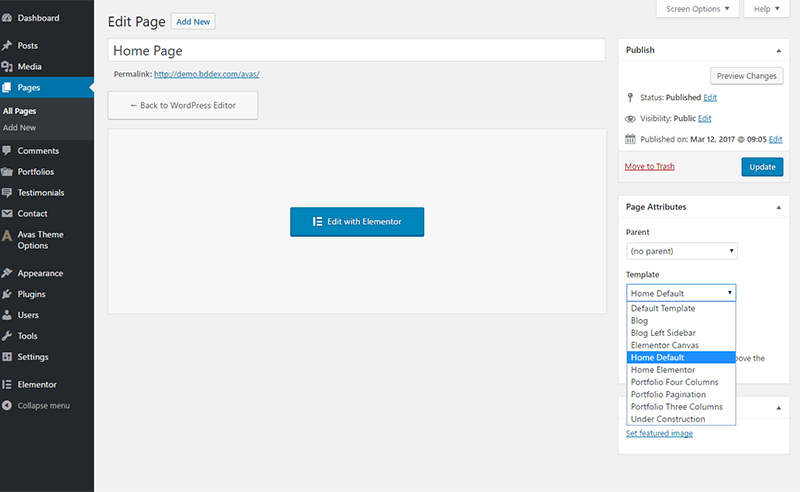
Pages / Templates
We have used Elementor plugin as page builder to create page template like home, about, sevices etc. So you have to familiar with Elementor plugin. If you are not then please do youtube or google then search for "How to use elementor plugin".
We have included some page template for Blog, Portfolio, Services, Team etc. So you can use them while create a new page and select templatge from right side Page Attributes section.
Mega Menu
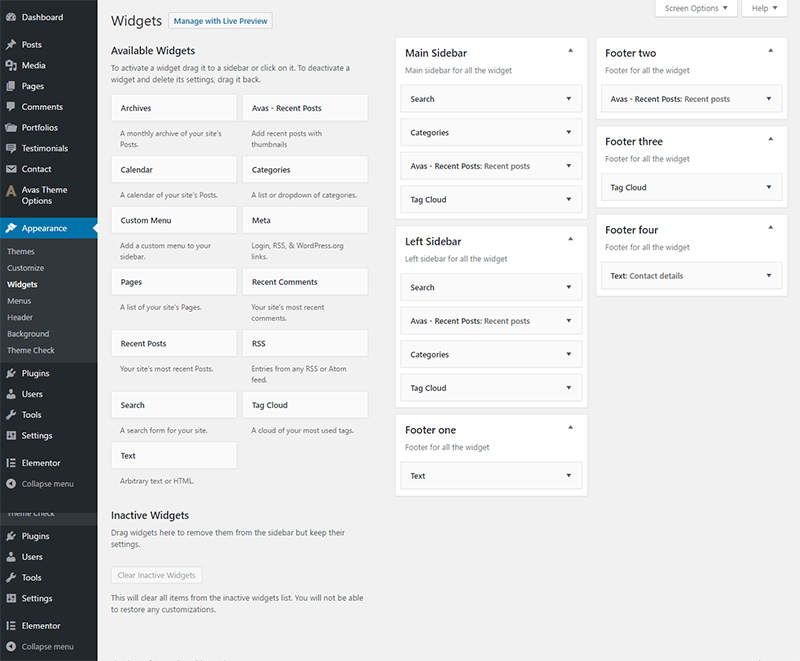
Widgets
We have created 2 sidebars for blog sections. Right and Left sidebar. To add/edit widgets inside a sidebar, navigate to the Appearance > Widgets section and choose widgets for Left Sidebar or Right Sidebar.
We have created 4 sections for footer widgets. To add/edit widgets inside a footer, navigate to the Appearance > Widgets section and choose widgets for Footer One, Footer Two, Footer Three, Footer Four.
Shortcodes
To display Social Icons in any page / posts or widget please use the shortcode [avas-social-media].
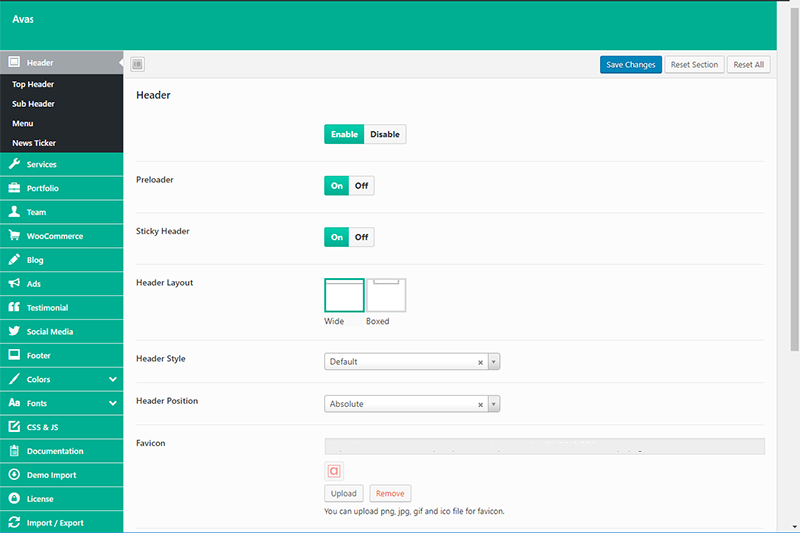
Header
You can control the header full wide or box layout, Select header style, enable disable full header part, search icon etc.
How to change header image in each page
Header and Menu settings
Logo and Favicon
To change the theme’s Logo and Favicon, please go to "Theme Options >> Header". Click upload button and upload your logo and Favicon according to each field.
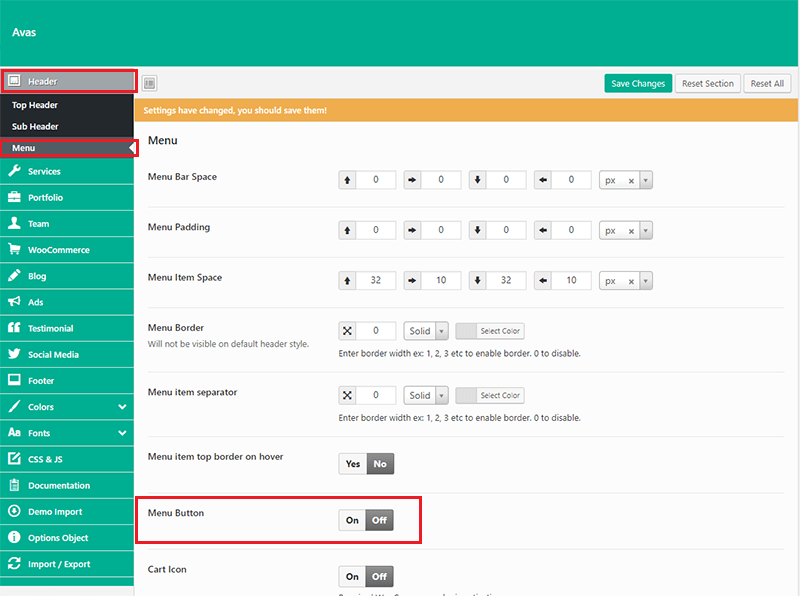
Buy Now Button
Buy Now button is a sample of call to action button so you can simply remove it via Theme Options > Header > Menu > Menu Button > Off.
Footer
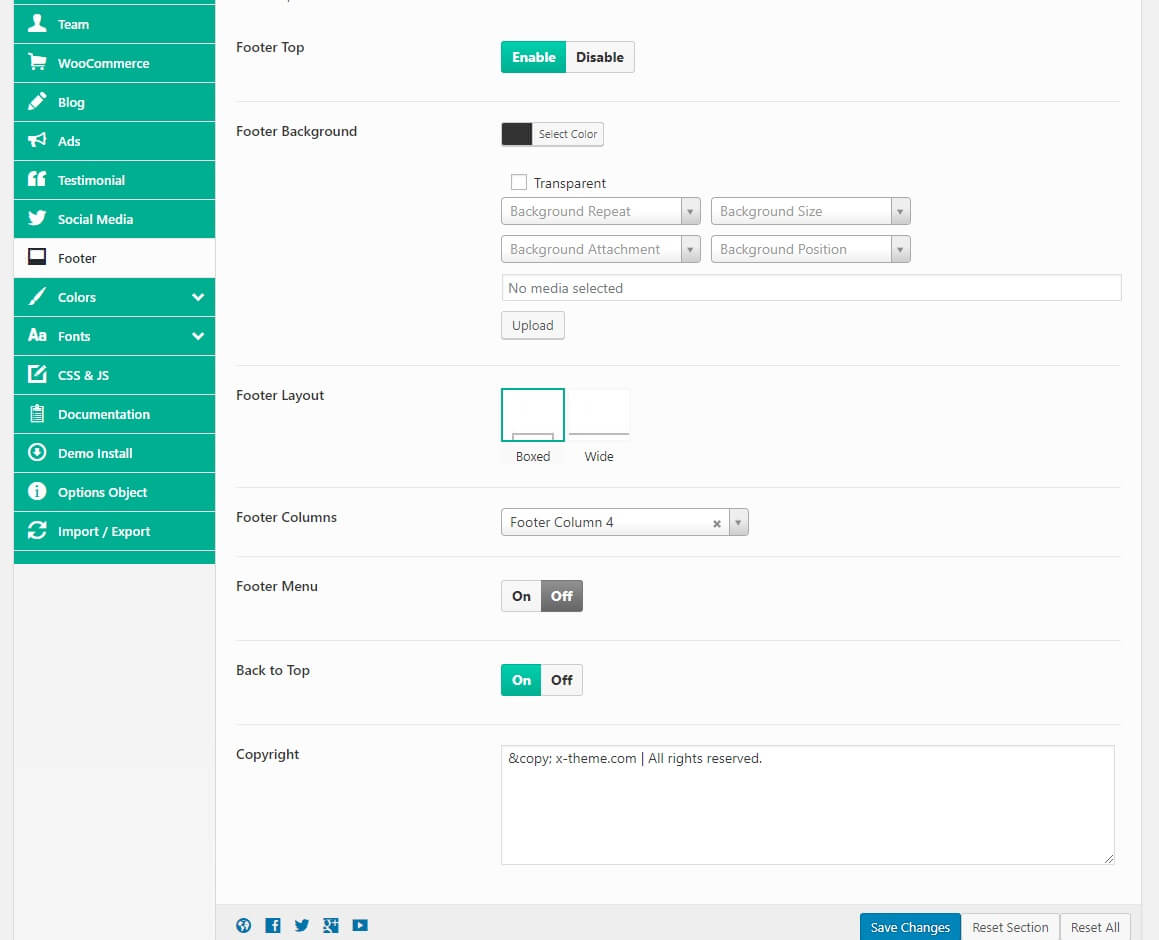
To change the copyright text please go to "Avas Theme Options >> Footer".
Translation
For all those who prefer translation using files included in the theme we recommend using the .mo/.po files. Those files work in pairs, so for each language you need to have 2 files with the same name but a different extension. For example, if you want to translate into German language, your files would be de_DE.mo and de_DE.po
To edit these files you need to use Poedit an easy to use software application. Simply upload the files into Poedit, edit them and upload them into the"languages" folder included in the theme.
Support
If you are having issues, please ensure that the solution isn't already covered in this documentation. If you read the documentation and can not find the answer to your issue, please send a message with as much information about the problem as possible at: